
Intro to Datapacks
A datapack is a collection of data stored in a folder or .zip file used to modify elements of the game. Due to them being predominately JSON-based, they are relatively easy to get into with no prior experience. Both Vanilla Minecraft and most mods use data in their implementation, meaning that they can be modified via datapacks. Common applications of data in vanilla/mods are recipes, tags, advancements, and worldgen, meaning that these elements of the game can be added, removed, and modified with datapacks.
Making a datapack
1. Create a folder
This can be done by right-clicking your desktop or inside another directory, and pressing “New” -> “Folder”. You can also press CTRL + Shift + N as a shortcut. You can name this folder anything.
2. Open the folder and create the data folder and pack.mcmeta file
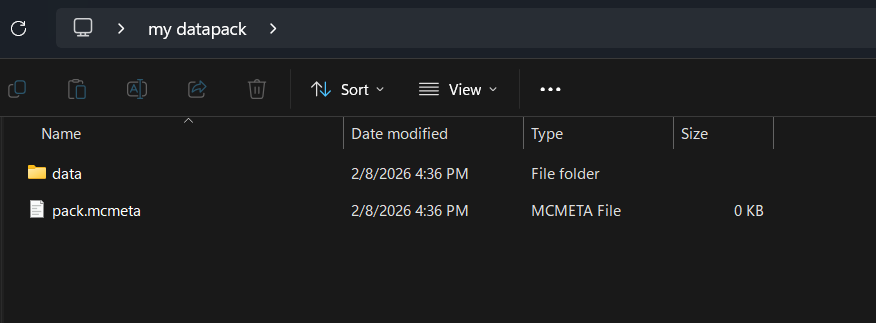
After you’ve opened the folder you just created, create another folder inside of it named data. Then, create a file named pack.mcmeta by right clicking, pressing “New” -> “Text Document”, then renaming the entire thing to pack.mcmeta, including the file extension. Your screen should look similar to the image below.
tip
Enabling file extensions is a must-have when doing nearly anything modpack related. On Windows, they can be turned on by going to Settings -> System -> Advanced -> File Explorer, then clicking the “Show File Extensions” tick.

3. Put information into the pack.mcmeta file
pack.mcmeta files include information on what Minecraft version a datapack is compatible for, among other things. To supply the correct information on what to include in a datapack, use Misode’s pack.mcmeta generator site to create the contents of the file. The only thing that matters here is the pack_format field, which should be 15 if the datapack is made for Minecraft version 1.20.1, and 48 if made for Minecraft version 1.21.1. Other pack formats for different versions can be found here.
pack.mcmeta - 1.20.1
{
  "pack": {
    "pack_format": 15,
    "description": "pack.mcmeta file for 1.20.1"
  }
}
pack.mcmeta - 1.21.1
{
  "pack": {
    "pack_format": 48,
    "description": "pack.mcmeta file for 1.21.1"
  }
}
4. Create a “Namespace” folder inside data folder
A Namespace determines “who” a set of data belongs to in a datapack. If you’re adding custom content with a datapack, and not editing anything from the base game or another mod, you should create your own namespace, ex; my_namespace. But if you’re modifying files in vanilla or in other mods, you should use theirs instead, otherwise they wouldn’t be overridden correctly, ex; minecraft, oreganized.
For the purposes of this guide, I will be doing all three.
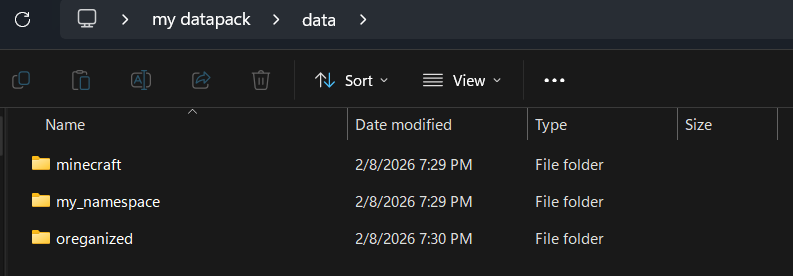
5. Create “data type” folders inside of the namespace folders
The data type folders determine what “kind” of data is to be created/modified. For the purposes of this example, we will be changing recipes. On 1.20.1 and below, the data type is called recipes, while on 1.21.1 and above, it’s called recipe.
To find the correct data type for what you want to override/create, there are a couple options. For vanilla Minecraft, you can use sites like MCasset or Misode to see the default data for the game. For mods, you can either view their source code (usually provided on their Curseforge / Modrinth sites, though not always) or open the mod .jar file in your modpack /mods directory with a program such as WinRAR or 7-Zip.
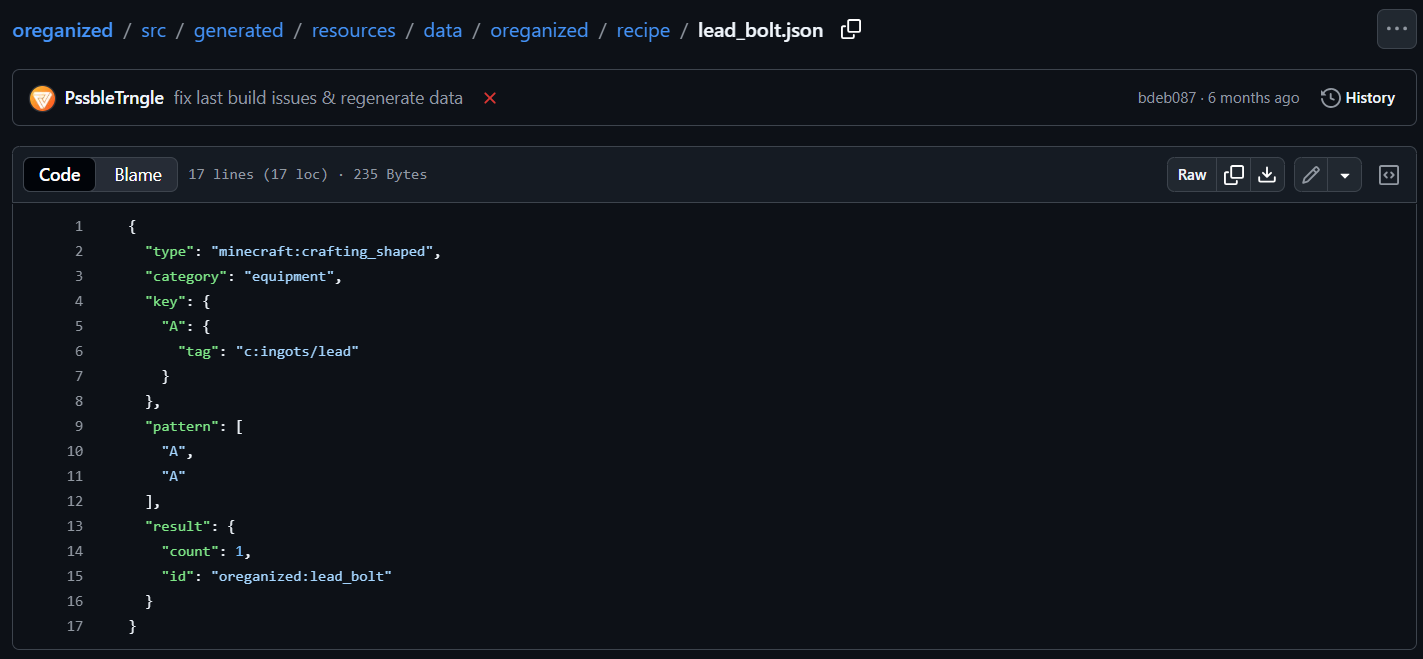
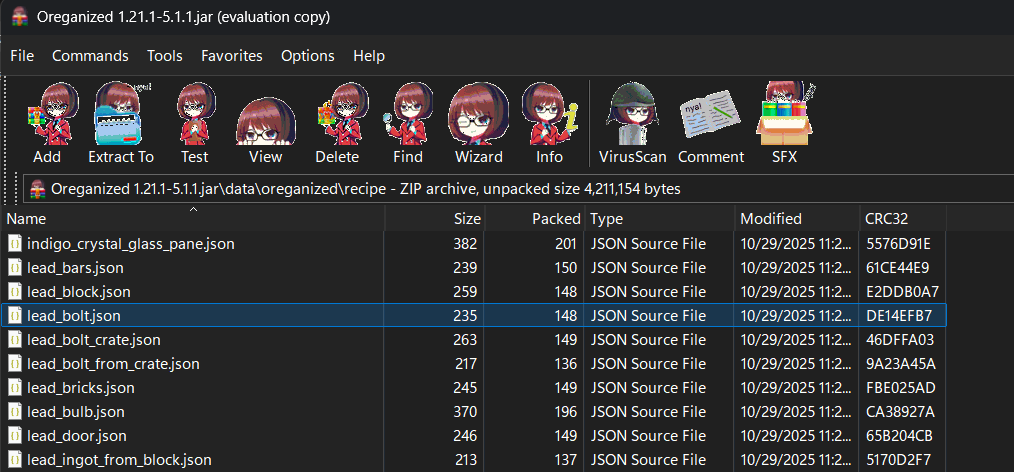
6. Create the data file
Once you’ve figured out exactly what you want to change by looking at the base data, you can override it by copying the exact filepath presented. In this case, we will be doing the following:
- Changing Minecraft’s “Stick” recipe
- Changing Oreganized’s “Lead Bolt” recipe
- Adding a new recipe converting diamonds to dirt
my-datapack/data/minecraft/recipe/stick.json
{
  "type": "minecraft:crafting_shaped",
  "category": "misc",
  "group": "sticks",
  "key": {
    "#": {
      "tag": "minecraft:planks"
    }
  },
  "pattern": [
    "#",
    "#"
  ],
  "result": {
    "count": 8,
    "id": "minecraft:stick"
  }
}
my-datapack/data/oreganized/recipe/lead_bolt.json
{
  "type": "minecraft:crafting_shaped",
  "category": "equipment",
  "key": {
    "A": {
      "tag": "c:ingots/lead"
    },
    "B": {
      "item": "minecraft:stick"
    },
    "C": {
      "item": "minecraft:feather"
    }
  },
  "pattern": [
    "A",
    "B",
    "C"
  ],
  "result": {
    "count": 2,
    "id": "oreganized:lead_bolt"
  }
}
my-datapack/data/my_namespace/recipe/dirt_to_diamond.json
{
  "type": "minecraft:crafting_shapeless",
  "category": "misc",
  "ingredients": [
    {
      "item": "minecraft:diamond"
    }
  ],
  "result": {
    "item": "minecraft:dirt"
  }
}
tip
You can use Misode’s datapack generator to easily create data files using vanilla data types
7. Zip the datapack (optional)
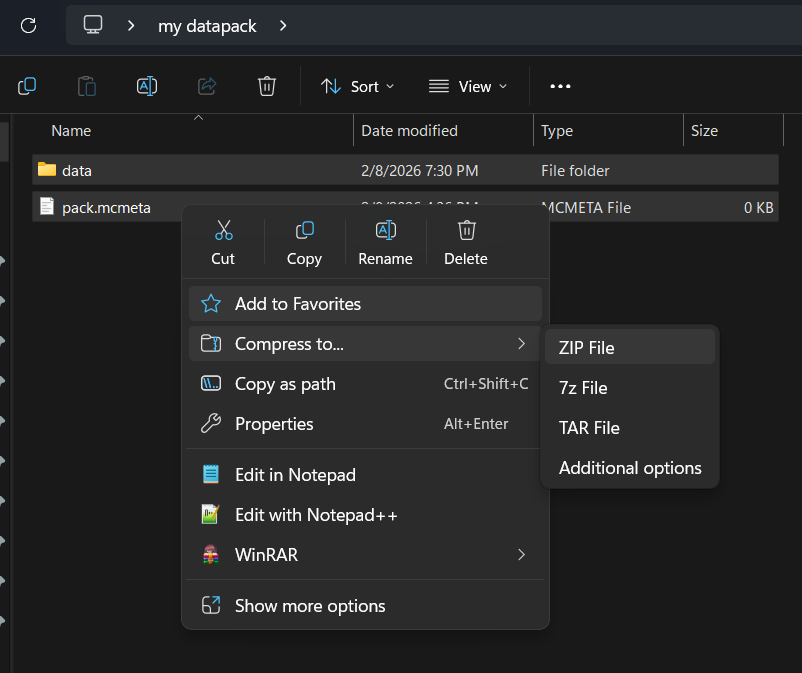
Once you’ve created the datapack, you can zip/compress it to make it easier to share standalone, or leave it as a folder. To zip the file, select both the data folder and pack.mcmeta file in the original folder, right click -> compress to -> ZIP file. Zipped files are easier to share but harder to edit, so if you’re going to actively be making changes to the datapack, you may want to leave it as a folder.
8. Loading the datapack
To load datapacks, ordinarily you’d have to manually place the file into your worlds datapacks folder, and it would not persist between worlds. However, in a modded environment, there are mods such as Open Loader and Paxi that automatically load datapacks placed in their config folder, or in other directories such as the <root>/datapacks directory that many launchers support. Additionally, KubeJS can act as a datapack loader, with <root>/kubejs/data/... loading data files put in it. Data loaded through KubeJS will have higher priority than ones loaded through Open Loader or Paxi.